If you are generally happy with the layout and functionality of your kitchen but you need some change then installing or changing your backsplash might be the right solution. Depending on the size of your kitchen, the budget you have and the material you have chosen this can be either a simple DIY project with impressive results or a professional job for a splendid finishing touch. No matter which approach you have chosen, though, there are fivemain steps that you need to follow for installing a new backsplash.
Choose a design and material
Before any remodeling project you need to look around for the best design and material that will fit your kitchen and match your style. The best place to look for ideas and inspiration is, of course, the internet. Browse through your favourite sites until you spot that perfect backsplash you want in your kitchen. Then keep on browsing to find the best bargain for getting the respective materials or professional assistance, in case you need any.
Prepare the kitchen and the walls
Now, once you already have the idea in your mind, the first step in your project will be to prepare your room and walls for the work. Move any freestanding appliances away from the walls. Clean the countertop of any utensils, dishes or decoration. As you need to remove the outlet covers and switch plates from the walls where the backsplash will be installed it is advisable to switch off the electricity before you do so. You can then tape the outlets, the cabinet edges and the places where your countertop meets the wall. Thus you will protect them from scratching and from any adhesive material or mortar you might need for the installation. If there is an oldbacksplash make sure to remove it properly. Check that your walls are even and fill any bigger dents (you can leave this to the professional in case you have decided to use one). Make sure that your walls are properly cleaned before you proceed. Attach a ledgerboard – a piece of wood that will support the backsplash if there is no countertop in the area, until the adhesive dries, in case you are using tiles.
Plan your pattern
No matter what kind of material you are going to use for your backsplash it is better to carefully plan the design and check if everything fits the way you are envisaging it. Dry-lay the tiles or other pieces you are using to recreate the pattern. If you are making a special image using mosaic tiles you can even draw it on the wall so it will serve you as a template for easier installation. If you are going to use natural stone tiles for your backsplash carefully measure all the distances between the countertop and the cabinets to check if and where you will need to cut the tiles. Keep in mind that some stone tiles, like slate, vary in thickness. You will need extra mortar to level them. You can mark them with some chalk on the back to distinguish them from the rest. Don't forget that you have to work around outlets, faucets and the like.
Install your backsplash
This is the most work-intense part of the entire project. Depending on the material and the size of your kitchen it may take you couple of hours or couple of days. If you are using self-adhesive faux tiles for your backsplash the work will be much less than if you are using hand-made ceramic tiles or mosaics to create a complicated pattern or image. No matter if you are installing marble tiles, glass pieces or stainless steel always follow the manufacturer instructions on how to seal, attach or clean them afterwards.
Post-installation maintenance
Once you are ready with the backsplash installation it is time to properly seal it and clean it. Wipe out any excessive grout, in case you have used tiles. Seal the installation properly. Give it time to dry if need be. Arrange the kitchen back to its normal setting and enjoy the new addition.
In order to facilitate you in choosing the best backsplash for your kitchen we offer three different approaches that you might find inspiring.
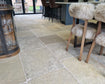
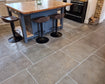
Timeless rock-solid beauty
If you want elegance and style that can last for a lifetime then you should opt for a backsplash made of natural stone. The material is on the expensive site, however the investment is worthy because of its durability and timeless beauty. If you have experience in laying natural stone tiles on the floor or walls you will be able to complete the project yourself as well. However, since natural stone is expensive and not very easy to work with material in terms of cutting, we recommend hiring a professional.
Marbleis a material, which has been used and loved since ancient times and is an excellent choice for an elegant backsplash. There is a great variety of nuances and finishes of the stone that can match any taste and style. Besides, you can combine it with virtually everything – marble countertops or floor tiles, other natural stone tiles, wood, etc.
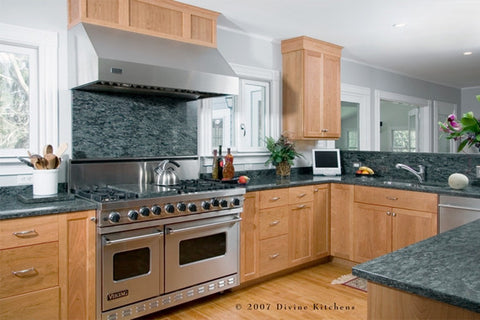
Granite is also a universal option for a backsplash that easily combines with any kitchen décor. It is resilient and easy to maintain and if you choose a darker nuance it will add a dramatic look to the entire room.
Tumbled stones such as limestone or travertine are very suitable for a kitchen style reminiscent of the old times. Their subtle, earthy nuances are ideal for a peaceful homey atmosphere.
If you like DIY projects and you have a tight budget to refresh your kitchen you will love these backsplash ideas. The final result looks like taken from a catalogue and you get all the credit for achieving it.
Chalkboard paint backsplash
This is quite an easy project that won't take much time but the final result will make you grin with satisfaction. The good thing is that you don't need to demolish your old backsplash. You can use it as a base for your new project. Clean the old backsplash area and prime it. Once the prime has dried start painting it with the chalkboard paint. Let it dry and then use chalk pens (they last more and draw better than ordinary chalk) to draw the design you like. The good thing is that when you get bored, you can always wipe it out and draw something else.
You can use any kind od paper to decorate some plywood and attach it to the wall. A smart idea is to bring the world to your kitchen by using maps or gen cooking inspiration with recipes written on burlap. You can also use comics, magazine covers and even wrapping paper. Take plywood and cut it according to the size of your wall. Glue the paper on top and cover it with shellac. Once it has dried attach it to the wall.
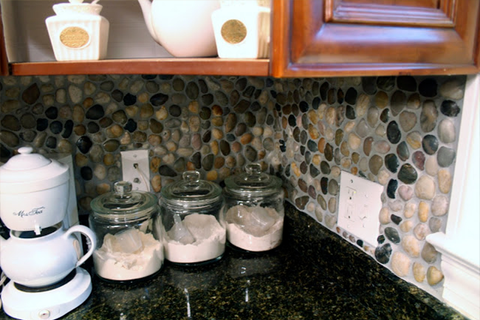
If you like natural materials but you have a tiny budget to spend for your backsplash then you can opt for river stones that you can find in almost every gardening store. Then with some patience and a lot of grout and cleaning you will end up with a sleek looking river stone backsplash that will add a natural and rustic vibe to your kitchen.
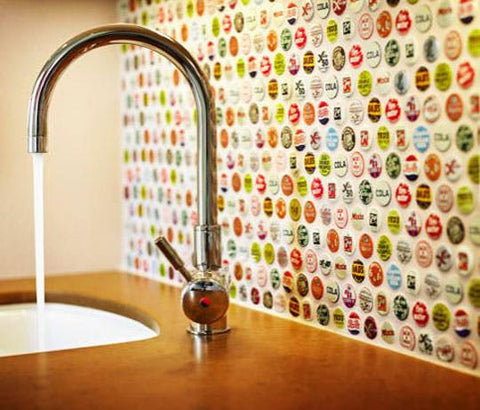
Are you a beer lover? Do you like collecting bottle caps from exotic brands you have tried? Now, this is a unusual way to utilize them – turn them into a backsplash for you kitchen. The look is perhaps more suitable for a bachelor's flat but can also be incorporated into a family kitchen.
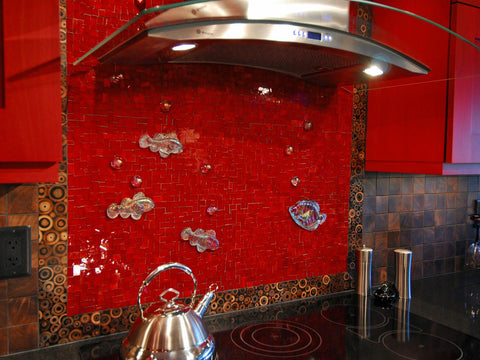
Mosaic tiles are a budget-friendly but beautiful way to create a backsplash in your kitchen. This can be an amusing project for DIY lovers. You can choose your own pattern and make your own mosaic tiles by breaking ceramic, natural stone or glass tiles into pieces. Then you can use your own imagination to create a design on the wall and tile it. You can mix different materials, shapes and colours. An interesting way to refresh your kitchen is by installing a mirror or reflective backsplash.
Night sky mosaic backsplash. Image source: Decoist