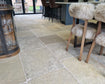
Marble floors are timeless classic and are an excellent choice for different rooms in your home – from entryways, through kitchens and bathrooms this gorgeous stone has the ability to become the focal point of any area.
If you want a personal touch in your floor décor then you can choose to lay the tiles yourself. It is not that complicated, however there are several specifications that you need to consider in order to achieve the desired effect.
Below you will find some practical tips on how to choose marble tiles, how to lay them and what you need to do next in order to help the stone maintain its gorgeous look throughout the years.
How to choose marble floor tiles?
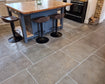
Marble comes in a great variety of colours and with different surface finishes so you are faced with a great choice. There are two most popular options for marble floor tiles – polished and tumbled or honed. Sometimes polished marble is even referred to as traditional marble as the shiny, glossy finish is usually associated with the look of this stone. So, if you decide to opt for polished floor tiles, you' d better use them in a smaller space such as a foyer or an entryway. They will look quite impressive and add light to the area, especially if you choose lighter colours.
Tumbled marble tiles usually come in earthy natural nuances like beige, milky or grey. The finish gives them a kind of rustic appearance. Since such tiles usually come in larger sizes, they are more suited for bigger rooms such as kitchens, dining areas or living rooms.
Last but not least, you have to determine the tile pattern that you want to use for your marble floor. Here you can play a bit with a pencil and a piece of paper or use one of the free design tools you can find on the internet in order to get a better visualization.
A step-by-step guide how to lay marble floor tiles
Once you are ready with selecting the best marble floor tiles and determining the pattern, you can start installing them. Here is a step-by-step guide that you can use as a reference for your work.
1. Prepare for the installation
Make sure that you wear comfortable, not baggy clothes, that are suitable for work. Get yourself gloves, mask and goggles that will protect you during the different steps of the process.
2. Prepare the floor
This step includes several phases. First you need to remove the old tiles if any and then clean and wash the floor. Once it is dry you need to make sure that the surface is levelled. You may need to sand down bumps or fill in cracks with thin-set cement. Make sure the cement is completely dry before proceeding. You may have to install plywood or cement board to level the floor.
3. Measure the floor and create a layout
You need to measure your floor and create reference lines that will help you with the pattern. If you have chosen a special layout you need to have it on paper in front of you so that you can follow it. If you are not very sure how it will turn out, it is good to spend some time and divide the floor using chalk or other material.
4. Prepare the mortar
It is best to use thin-set mortar for your marble tiles. Mix it according to the instructions. Prepare a small quantity first, so that it won't dry. Use a notched trowel to spread enough mortar so that you can lay one tile.
5. Install the first tile
Take the first tile and lay it on the spread mortar. Make sure that it fits the pattern you have chosen. It is good to start from the center and work your way round. Make sure not to step on any newly laid tiles. Plan your work in such a way so that you end up at the door and not cornered in one of the room angles. You can use a rubber mallet to tap the tile to make sure that it fits evenly.
6. Use tile spacer
The procedure for installing the next tiles is the same as that for the first one – spread mortar, lay tile, tap it with a rubber mallet. Don't forget to use tile spacer in order to keep consistent spacing between them. Thus, you will have good grout lines.
7. Remove excess mortar
If any mortar comes through the grout lines make sure to remove it asap.
8. Apply sealant
Once your tiles are laid you need to seal them before applying grout. This is very important as it will protect the stone both from stains and will make it more resistible to other damage.
9. Apply grout
Now your tiles are ready to be grouted. Mix the grout as per the instructions. Mix only a small amount that will be sufficient for 15-20 minutes of work as this is the time it needs to settle. Use a grout float to direct the mix into the grooves and remove the excess from the tiles.
10. Clean the tiles
Once you are ready with all the grout make sure to wipe all the tiles clean with a slightly damp grout sponge. Be careful not to remove the grout from the grooves.
11. Seal the grout
The last step in the process is to seal the grout. This, however, is done after some time – can be up to seven days. Check the manufacturer's instructions and proceed accordingly. You can also seal the marble tiles again, so that they are ready to withstand the traffic longer.
Use a wet saw to cut tiles
Most probably you will need to cut some tiles so that they can fir your pattern or a specific area in the room. The best tool for cutting marble tiles is the wet saw. You can either buy one, if you are planning more tile work, or rent it out.
Basic cleaning and maintenance ideas
One of the important factors for protecting your marble floors is to seal them properly. There are three main types of sealers for marble tiles that you can choose from:
Topical sealers – they are applied to the top of the marble tile and act more like colour or shine enhancers. These sealers wear off quicker and are not suitable for high-traffic areas. They also make the surface more slippery especially when wet.
Penetrating sealers – they soak into the stone and are quite good against liquids and oils. They do not affect the appearance of marble when applied. Penetrating sealers last longer than topical ones but still need to be reapplied after six months or a year.
Impregnating sealers – these are the best solution for marble floor tiles as they provide the necessary high level of protection. They don't affect the colour of the stone and successfully repel water and oils. The period to reapply them is much longer.
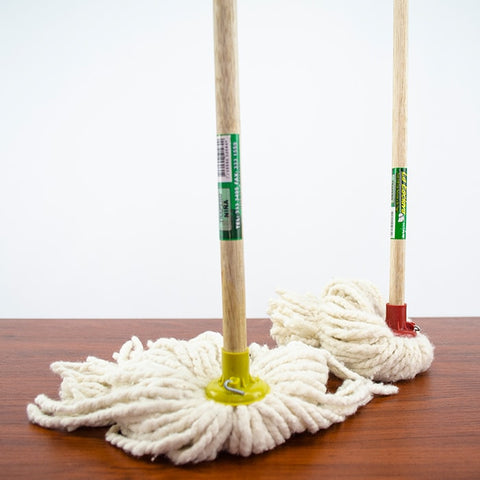
In order to keep your marble floor free of stains make sure to remove any stains as soon as possible. It is better to blot than to wipe them. Use special marble tile cleaners and not conventional cleaning products. Mild soap and dishwashing liquid is also acceptable. Clean with soft, clean mops and plenty of water. Don't let the marble floor dry naturally but rather use a microfiber cloth to buff it and bring out its natural shine.
Be aware of any acidic liquids as they can damage and etch marble. Steer clear from ammonia-based cleaners as well. Never use any abrasives on this gentle stone. Swipe the dirt and avoid vacuum cleaners as its wheels may scratch the tiles.